Configure Hadoop
Now that Hadoop has been unpacked, we are ready to configure it.
- Open a new Cygwin window and execute the following commands:
cd hadoop-0.19.1
cd conf
explorer .
cd conf
explorer .

Bringing up explorer window
- The last command will cause the Explorer window for the 'conf' directory to pop up. Minimize it for now or move it to the side.
- Launch Eclipse.
- Bring up the 'conf' Explorer window opened in Step 2 and drag the file hadoop-site to the Eclipse main window.
- Insert the following lines between <configuration> and </configuration> tags.
<property>

<name>fs.default.name</name>

<value>hdfs://localhost:9100</value>

</property>

<property>

<name>mapred.job.tracker</name>

<value>localhost:9101</value>

</property>

<property>

<name>dfs.replication</name>

<value>1</value>

</property>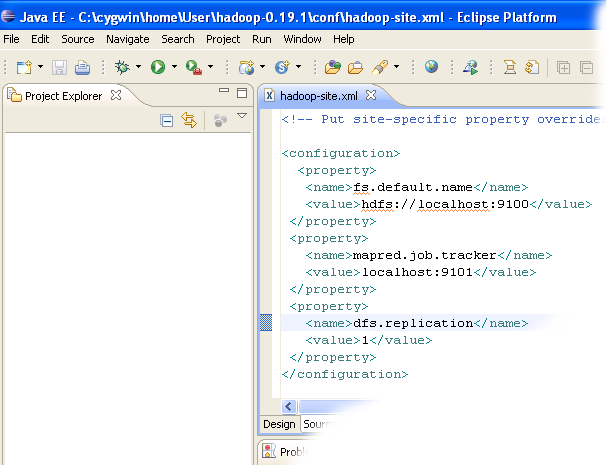
Editing site configuration file
- Close the Eclipse, Cygwin command and Explorer windows.
![]()
If you have questions comments suggestions regarding this tutorial you can post them here or you can write me an email to tutorials AT v-lad.org.