Install Hadoop plug-in
The next step is to install and check the Hadoop plug-in for Eclipse.
- Open a new Cygwin window and execute the following commands:
cd hadoop-0.19.1
cd contrib
cd eclipse-plugin
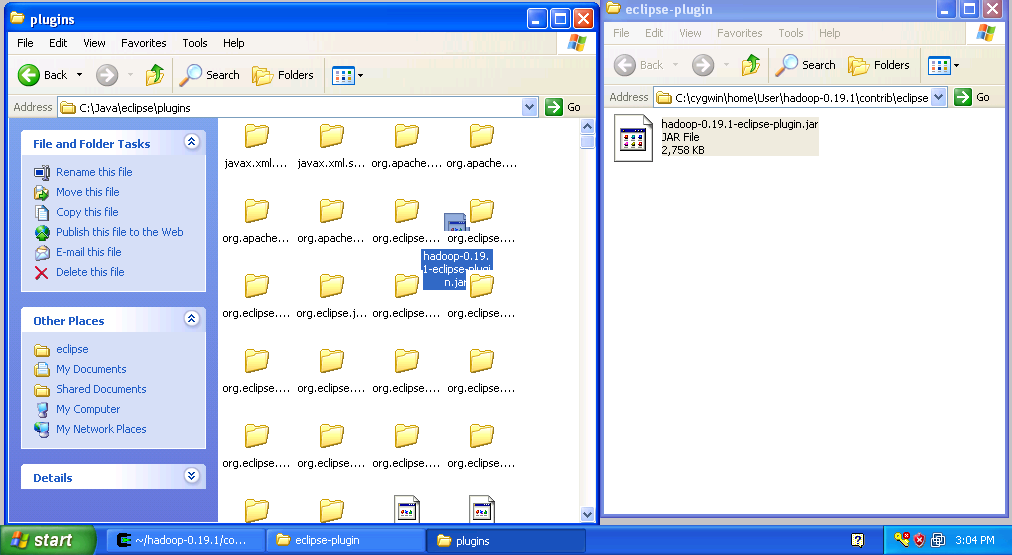
explorer . Navigate to Hadoop eclipse plugin folder
- Shrink the newly popped window and move it to the right of the screen.
- Open another Explorer window either through "My Computer" icon or by using the "Start -> Run" menu. Navigate to the Eclipse installation and open the "plugins" folder.
- Copy the file "hadoop-0.19.1-eclipse-plugin.jar" from the Hadoop eclipse-plugin folder to the Eclipse plugins folder as shown in the figure below.
Copy Hadoop Eclipse Plugin
- Close both explorer windows
- Start Eclipse
- Click on the open perspective icon
 ,which is usually located in the upper-right corner the eclipse application. Then select Other from the menu.
 - Select Map/Reduce from the list of perspectives and press "OK" button.
- As a result your IDE should open a new perspective that looks similar to the image below.

Eclipse Map/Reduce Perspective
Now that the we installed and configured hadoop cluster and eclipse plugin i's a time to test the setup by running a simple project.
![]()
If you have questions comments suggestions regarding this tutorial you can post them here or you can write me an email to tutorials AT v-lad.org.